so get out your journal and a pen, write down your ideas and experiences and as always happy gardening.
the denver public library
| g squared environmental design |
|
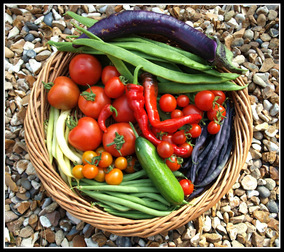
 as fall quickly approaches and you are getting ready to put your garden away for the season, remember some simple rules for next year. one thing that helps me remember what to do for next year is keeping a journal with sketches. what worked, what didn't, what needs more water, what needs more sun...writing down and sketching things is tremendously helpful for next years harvest to be bigger and better. another important thing that will be beneficial is removal of all dead, dying or disease plant material. you want to start the spring with a clean slate so to speak. you can also cover your soil with cloth, straw or another ground cover depending on what you want to use the soil for the following year. this would also be a good time to add to your compost bin or start one from scratch. i am not going to go into composting in this post however look for one in a future post. as with anything in life simplifying, organizing and planning will go a long way for you and make your life easier in the spring. there are tons of web resources, books and blogs for you to peruse. if you are a novice or even an expert, let me suggest on of the finest resources you can have that won't cost you a penny (unless your late), a library card. so get out your journal and a pen, write down your ideas and experiences and as always happy gardening. the denver public library
0 Comments
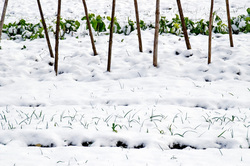 fall has left us here in denver and winter is now upon us, however there are still a few things you can do to get your garden ready for next year. rake up leaves if you haven't already especially if you have a lawn. grass still needs sunlight so it can create sugars to store in its roots throughout the winter. allowing leaves and other debris on the lawn can smother it. consider turning into mulch or composting the leaves for later use in your garden. any plants left in your garden need to be tended to accordingly. clear out any plants with black stems, plants with visible pests or fungi, foliage of annuals, fruits and vegetables to prevent the possibility of diseases, pests or other pathogens from disturbing future plants, trees or shrubs. while pruning and clearing out dead or unwanted debris is great, it can turn unhealthy if done excessively. make sure you do research on the plant, tree or shrub before doing your best impression of edward scissor hands. check pH levels before applying any chemicals or treatments. it will help reveal any areas that need special attention so you can garden smarter not harder. cover flower beds if you have done fall plantings to add extra protection through the extremely colder months. a little planning goes a long way in almost all aspects of life and especially in gardening. if you take care of your garden before some serious snow hits denver, you will be one step closer to getting a jump on things for the coming spring. happy winterizing... 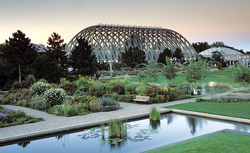 getting ideas… whenever i am meeting clients for the first time, it is exciting and can be overwhelming at the same time. some clients know exactly what they want but want a professional to make it come to fruition. some clients have a bunch of ideas but not a clear or cohesive vision. this is where i come in as a designer. it is my job to marry the desires of the client(s), the budget and constraints into a master plan. still other client have no direction as to what it is they want other than to make it look pretty or to function a certain way. i have a few suggestions for those of you that are having a hard go of it in figuring out what is the best fit for you, your space and your lifestyle. start a journal of the things listed below. first i would suggest looking in your own neighborhood or city for things you like and just as important the things you don’t. chances are if it grows for your neighbor it will grow for you. start noticing types of materials that you enjoy and why you enjoy them. for example if you like a retention wall, what is it about this wall that you like…is it the color, the texture, the shape, the height or its function. really start to notice and take in your surroundings. if nothing strikes your fancy in your neighborhood start to venture out to other neighborhoods or places. the denver botanic gardens are a great place to go if you want to capture ideas that work great for this climate. if you aren’t in denver then visit your local garden(s) or conservatory. again take note of what it is you like or dislike and why or the feeling it evokes for you. get up close and personal to the elements and touch and smell them if you can. really start to experience the landscape and take it all in. remember that you want your space to reflect you and your lifestyle. if sightseeing and sauntering through your neighborhood or city is not your thing, then try the internet or magazines. there are tons of home, gardening and lifestyle magazines to sort through. go to your local book store, grab a beverage and start flipping through pages. if you don’t want to purchase dozens of magazines, write down the name and page number and take a photo of the design. again note what you like/dislike and why. same with the internet, start capturing images or book marking pages you like. take special note on seasonality if you live in a climate with distinct seasonal changes. what might look great in the spring might not be your cup of tea during other seasons. while not everything looks great all year long, multi season appeal is not that difficult to achieve. you will be glad you kept the journal when you sit down with your designer, trust me. this will save you time, energy, money and a few headaches in the end. you don’t have to know exactly what you want or how to get there, that is why you are looking for a professional after all. for those of you that are having some anxiety, a little direction will go a long way in facilitating this process and easing your mind. happy gardening… http://www.botanicgardens.org/ photo courtesy of the Denver Botanic Gardens 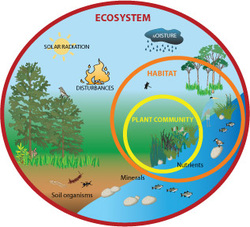 growing native… when most people ask me questions about landscaping it’s because they need advice on what to do with their space. i tell them it is very similar to real estate; location is everything. not only the location of where you live, it is also the location of where you want to put elements. you can, in theory, grow almost anything almost anywhere. this method however requires a lot of resources, like water and great soil to name a couple. this does not guarantee that your garden will thrive. and you don’t want your landscaping to merely exist… you want it to thrive! the right plant for the right place is the mantra we are taught in landscape architecture. so it stands to reason that different climates call for different requirements as far as resources and plant palate selection. one common method to minimize the use of resources, such as water, is to choose a plant palate that is considered native and non-invasive. a native plant, tree or shrub can best be described as one that is indigenous or naturalized to an area and usually refers to species that were there before colonization. invasive species can wreak havoc on something as small as a yard to something as large as an ecological system. so when designing a space, environmental sensitivity should be considered if you wish to conserve resources and want your landscape to thrive. resources on native and non-invasive species in colorado: http://www.slideshare.net/Fujita64g/a1o351 http://jeffco.us/coopext/intro.jsp http://www.ext.colostate.edu/ptlk/1710.html happy gardening… 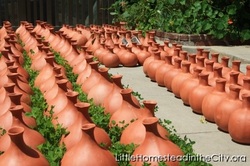 use only what you need, it’s a drought! this slogan is, in my opinion, all wrong. the slogan should be… IT’S A DESERT! so in the interest of debating how much water denver should and shouldn’t be using, let’s explore some options to utilize it more efficiently in this desert landscape. in today’s post we will talk about an OLLA (pronounced oh-yah). traditionally olla’s are made of porous non finished clay pottery and are used for many things, including irrigation. they typically have a bulbous bottom with a narrow neck. they can be made and/or bought in many different sizes and shapes can vary as well. you bury the pot with the neck opening above the soil line so that it can be filled with water. the water will then slowly seep through the pot into the soil and be readily available for you plants to drink. using an olla illuminates runoff, slows down evaporation and supplies the water directly to the roots of your plant(s). resources and photos: http://drippingspringsollas.com/ http://growingawarenessurbanfarm.com/ollas http://rosedalegarden.org/olla-irrigation/ http://youtu.be/qkNxACJ9vPI here is a link that gives a good explanation of an olla and how to use them: http://youtu.be/fvKq5geEM-A some people have come up with creative ways to re-purpose other items into ollas. you can use a milk jug as seen at the link: http://youtu.be/pCkeB2l3ODQ others have used two terra cotta pots and adhere them together as shown in this link: http://youtu.be/s0BryMMFwME these are just a few resources and videos about ollas and are by no means an exhaustive list. it is a good starting point for those interested in ollas and water conservation, especially in the southwest and more arid climates. happy gardening... |
g2designer, artist, photographer, traveler extraordinaire, consultant, teacher and student... archives
September 2014
categories
All
|